xSQL Builder, Version 12
Creating a package using the user interface
| Using xSQL Builder > Creating a package using the user interface |
The user interface wizard guides you through the steps of configuring and building an executable package:
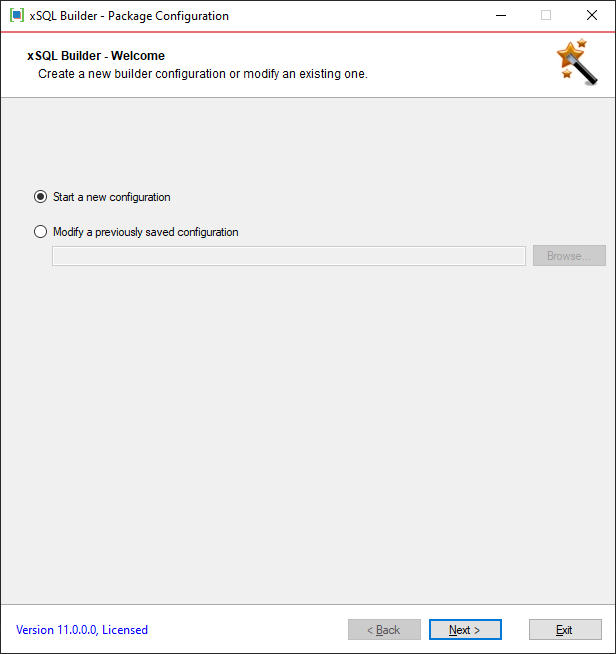
Step 1: Starts a new configuration or modifies an existing one.
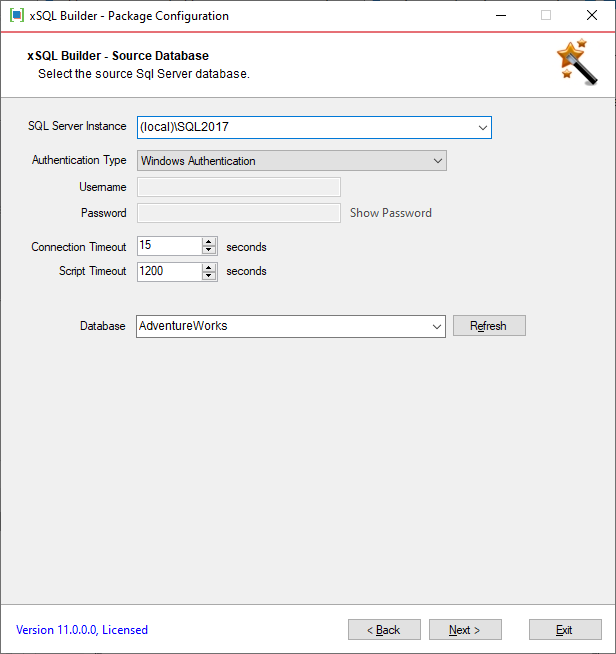
Step 2: Collects the information about the master database. This is the database the schema of which will be pushed to the client machine. You must be able to access the master database from the machine where you are running the xSQL Builder.
Step 3: Allows you to choose between synchronizing an existing destination database or creating a new one.
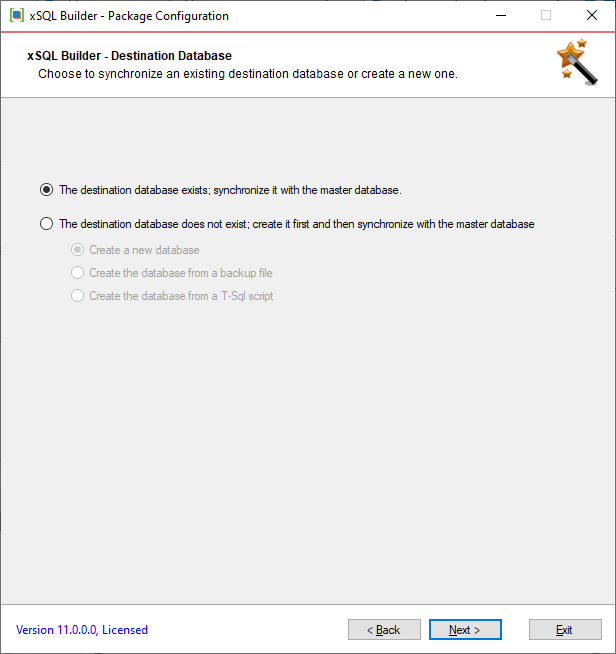
Step 4: Depending on the option selected in the step 3, it presents you one of the followings:
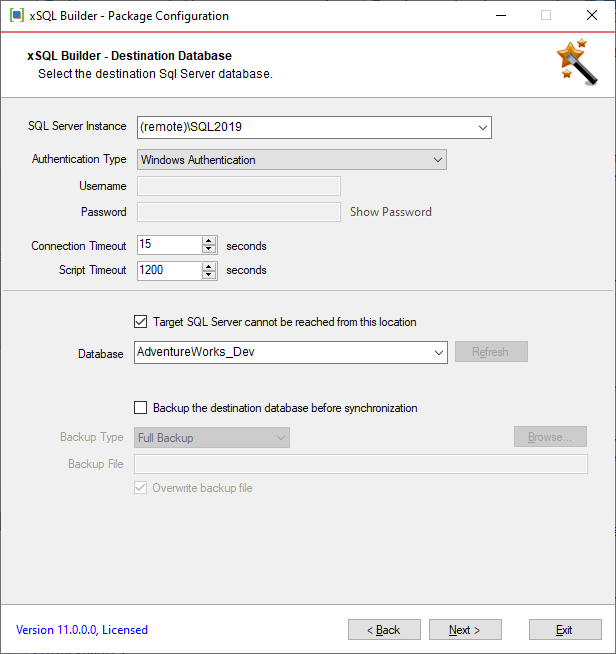
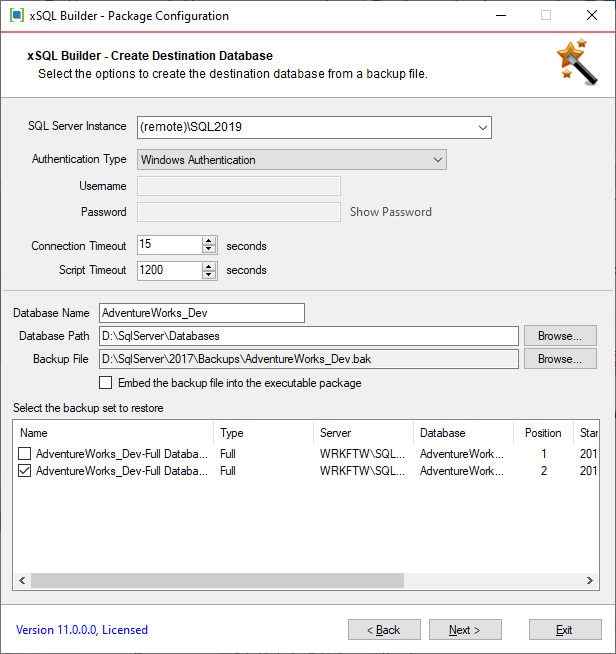
The path where the database backup will be saved must exist on the client machine. The wizard cannot check the path existence at the time when the package is configured.

The backup file must be a SQL Server backup and can contain one or multiple backup sets. xSQL Builder reads the backup header and displays the backup sets in the backup sets grid. You check one or multiple backup sets in the backup sets grid. If you choose to restore multiple backup sets, all backup sets except for the last one will be restored with NORECOVERY option.
Please note that the backup option is intended to create a new database. If the target database already exists when the package is executed, the backup restore operation will fail.

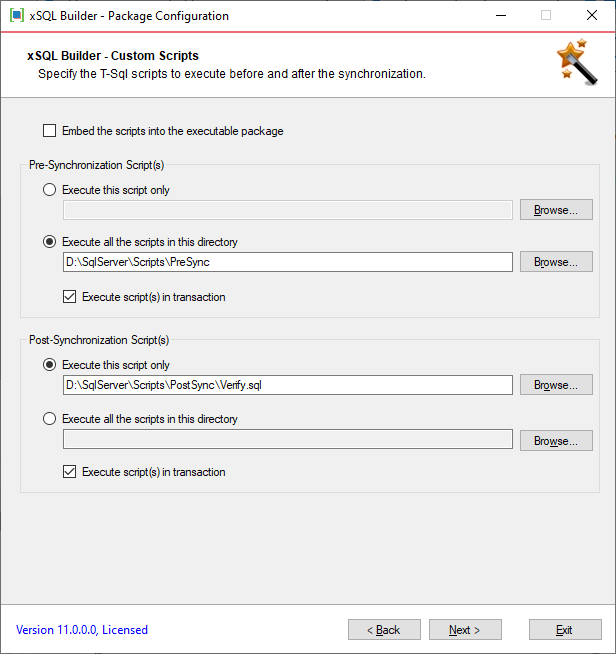
Step 5: Provides the custom scripts options. Custom scripts are T-SQL scripts and should be executed against the target database before the synchronization (pre-sync scripts) or after the synchronization (post-sync scripts). You can specify a single file or the entire content of a folder. When the folder is selected, all the files with .sql extensions in that folder will be executed in the alphabetical order.
If you choose to embed the T-SQL scripts, xSQL Builder compresses and embeds them into the executable package; otherwise the script files must exist on the client machine where the package is deployed.
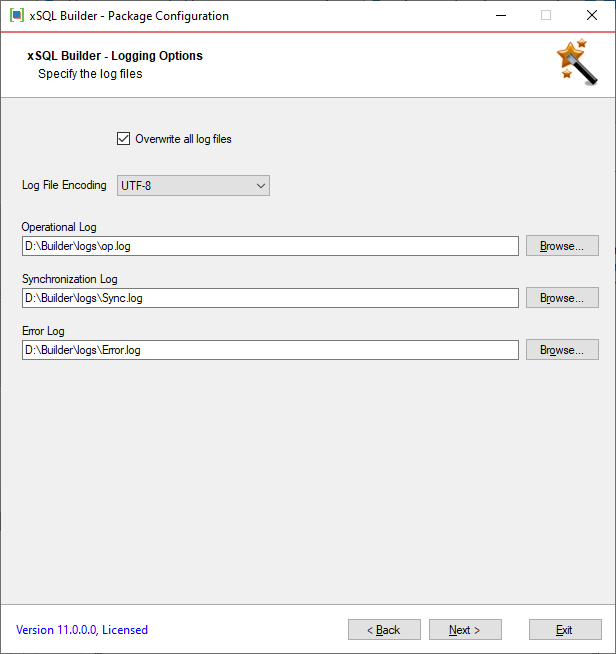
Step 6: Provides logging options. You can choose to generate three types of logs:
 |
The path of the log files must exists on the client machine. By default log files use ANSI encoding, but you can choose a different one. |
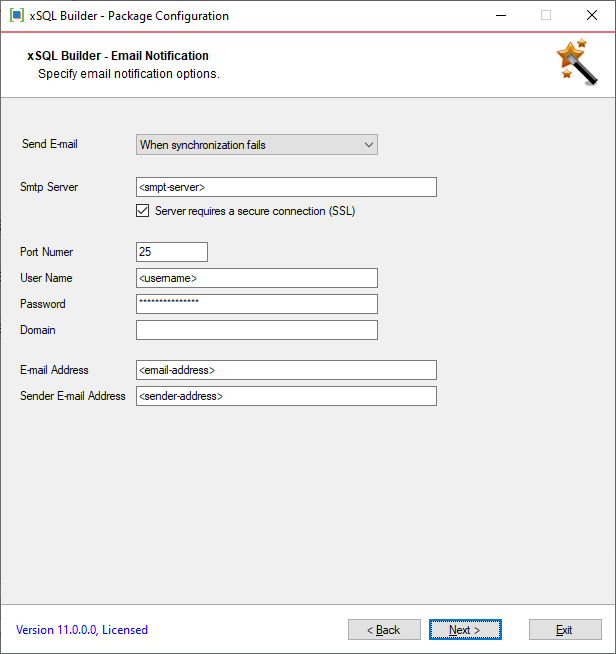
Step 7: Provides notification options. You can choose to send an email notification when the package on the client machine fails, succeeds or completes. The notification is email-based and requires an SMTP mail server along with the necessary credentials. You can specify a designated email address where the notification will be sent to and the senders email address. If the process fails, by default the error log is appended to the email notification.
Step 8: Presents some additional settings: